Discover Various Methods to Remove Duplicates In Excel
Tired of navigating the duplicates in Excel? Don’t worry, your struggle will eventually end here. This article will surely assist you in removing duplication in Excel and getting out of this challenging situation.
As we all know, Microsoft Excel is extensively used for organizing analysis reports of various businesses, and nearly everyone faces hardships in managing clear and organized data in it. However, duplicate entries can be problematic sometimes, as data can be misrepresented and fail to illustrate adequate insights.
Adhere to this article till the end, to know how to locate and remove duplicates in Excel smoothly.
Quick Answer: To remove duplicates in Excel, select the tab with duplicates and click on Data, then select Remove Duplicates to get rid of repeating values.
How to Identify Duplicates in Excel?
Duplicate entries can occur due to varied causes, such as accidentally re-entering the data while merging two columns, numerous people having access, and stats importing from multiple origins.
Identifying these duplicates is now not a big deal. Here we listed a few easy steps by which you can easily locate or highlight the duplicate entry:
- Open your Excel spreadsheet.
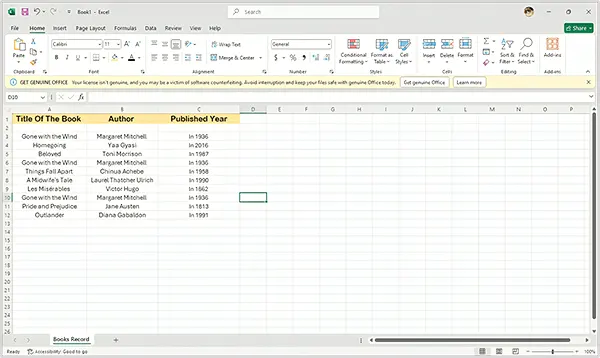
- Select the Range of Data you want to check.
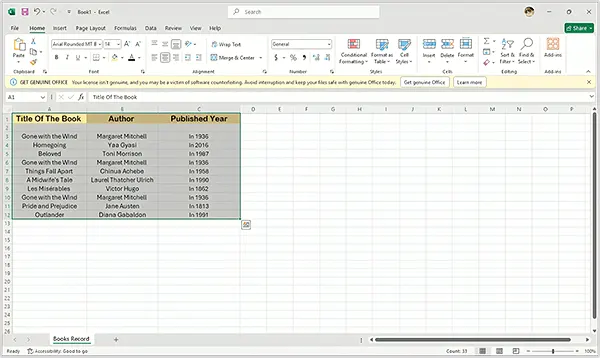
- Locate the Home Tab.

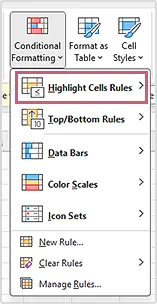
- Click Conditional Formatting.

- Select Highlight Cells Rules.
- Click on Duplicate Values.
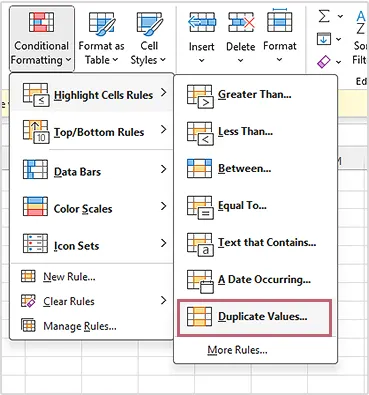
- As a result, your duplicate entries will be highlighted.
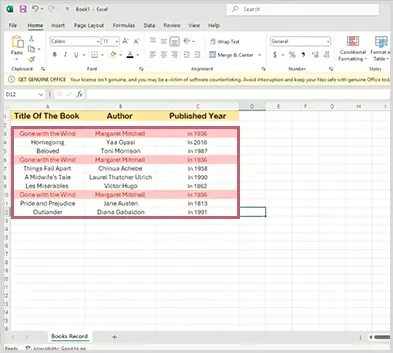
Hence, by simply heeding the six steps, you will be able to highlight your duplicate entries in your spreadsheet and recheck the details to avoid losing the essential insights.
How to Remove the Duplicate Values in Excel?
After discovering the duplicate entries, removing the unnecessary re-entries task is left. You will be amazed to know that Excel has built-in features to help you out of this situation.
Follow the mentioned steps carefully to make your Excel sheet clean and credible.
- Open Excel Spreadsheet.
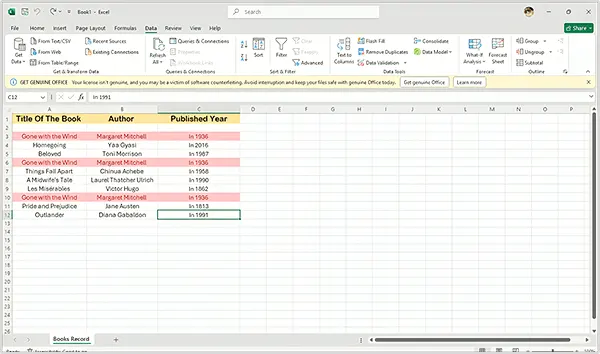
- Select the Range of Data, you want to remove duplicates.
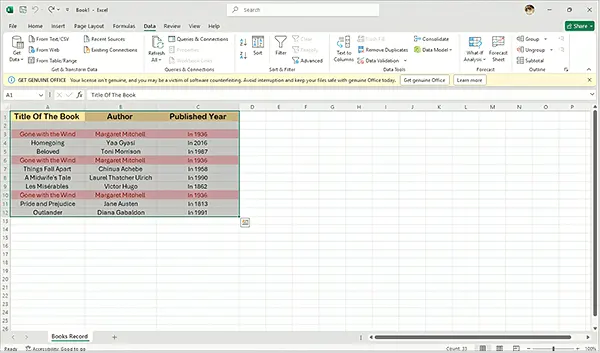
- Click on the Data tab.

- Locate and remove Duplicates in the Data Tools Group.

- Select the Columns to check for duplicates, in the remove duplicates window.
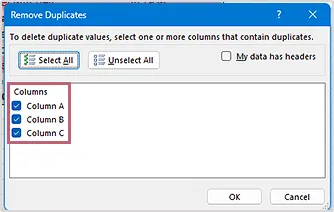
- If your header has data, click the My Data has headers.
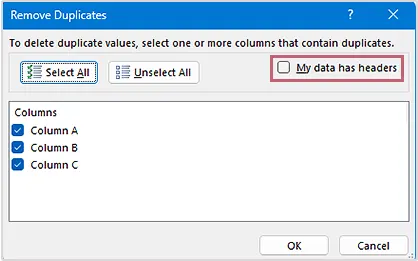
- Click OK.
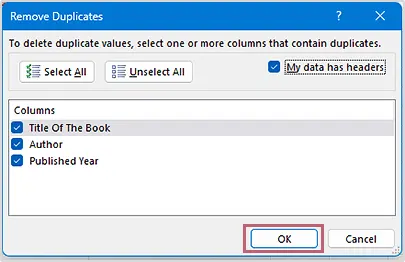
- Click OK.

- As a result, your duplicate entries will be removed.

Therefore, by following 8 simple steps, you can use the built-in feature and effortlessly remove duplicates in Excel.
Read more: How to Add Music to Google Slides: 4 Effective Ways to Add Engaging Audio
Apply Filters to Remove Unique Value Duplicates In Excel
Now, removing the duplicated entries is not time-consuming. Microsoft Excel holds various ways to make this task easy and assist in presenting your spreadsheet as pleasing and effective.
Here, we have listed some easy-to-follow steps to apply filters to remove duplicates in Excel.
- Select the Row, to which you want to apply a filter to remove duplicates in Excel.
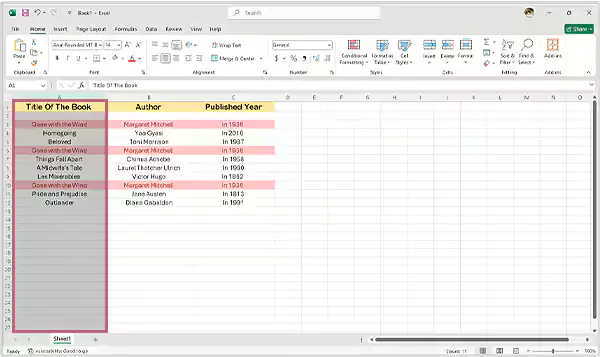
- Click Data Tab.

- Locate and click the Advanced option in the Sort & Filters section.
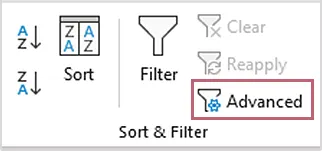
- Click OK, on the window pop-up.

- To filter the selected row, click the Filter the list, in-place option, and Unique Record only.
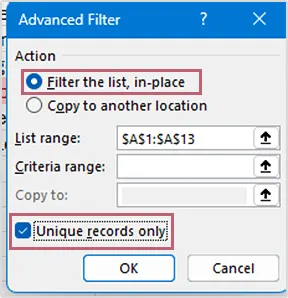
- Click OK.
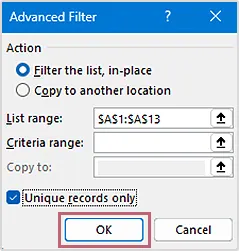
- As a result, your selected row will be filtered, and there won’t be any duplicates.
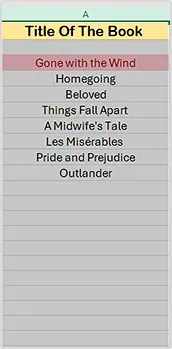
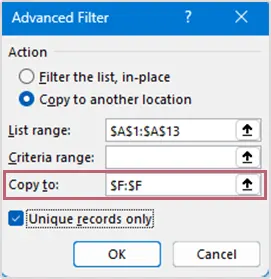
- Also, if you wish to copy the duplicate free data in another row, click on Copy to another location and Unique Records only.
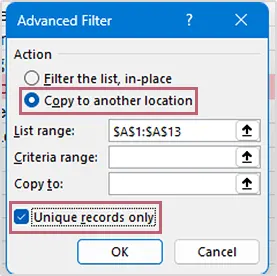
- Enter the Formula where you would like to copy the unique entry.
For example, the formula to copy the content in the F row would be $F:$F.
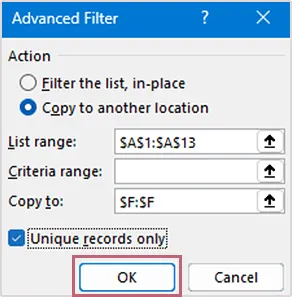
- Click OK.
- As a result, your duplicate data is copied into another row.
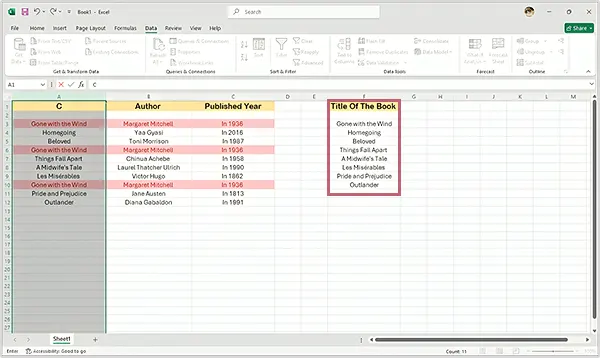
Hence, by following the steps mentioned above, you can apply filters to remove duplicates in Excel, without wasting time.
Use Formula to Remove Duplicates In Excel
Applying the formula is the next method on our list to resolve the issue of duplicate data in Excel. With a simple formula, you can make your spreadsheet look adequate by getting rid of the duplicates.
Follow the listed steps carefully to apply the formula for removing the duplicates:
- Select the Row, where you want to apply the formula.
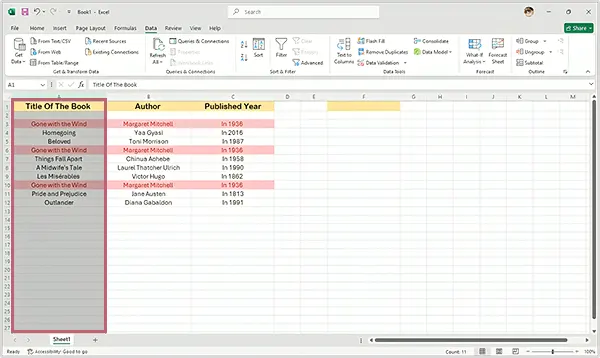
- Select the Row, where you want to copy your duplicate free data.
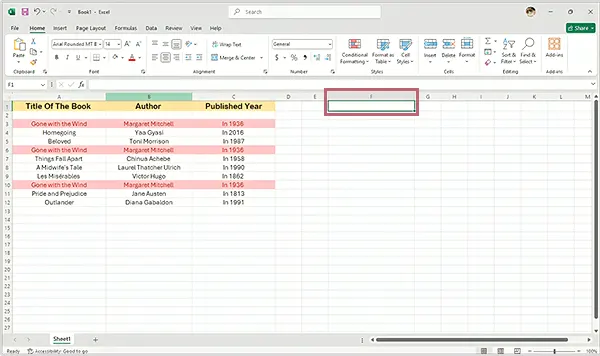
- Enter the Formula in the formula box.
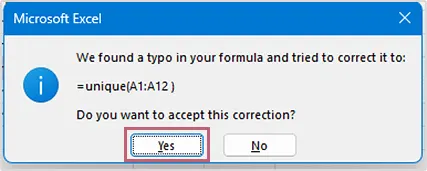
For example, if you want to copy your A row that consists of 12 columns, then your formula will be: =unique A1:A12 and press enter.

- Click Yes.
- As a result, you will see your data has been copied without any duplicate entries.
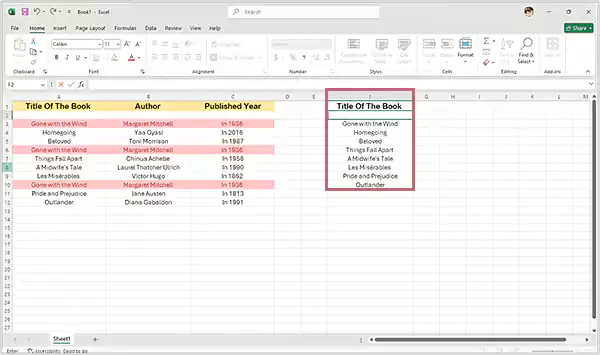
Hence, adhering to the above-mentioned steps, you can easily remove duplicates in Excel using the formula technique.
How to Duplicate A Sheet in Excel?
Afterward, if you wish to make a copy of your Excel sheet without wasting time on copying each column and row, then you must check out the listed below steps to copy a spreadsheet in a few seconds.
Follow the steps mentioned below carefully.
- Drag to the left or right to select the sheet.
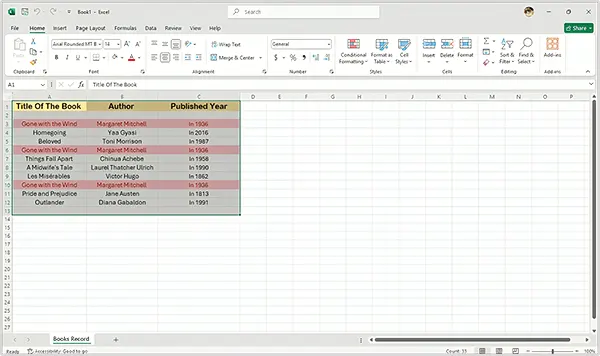
- Locate the Home Tab.

- Click on Format, in the cell section.

- Go to the Move or Copy Sheet option.
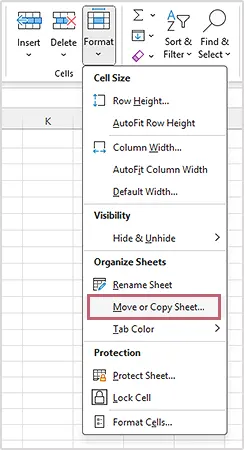
- Click on Create a Copy and then on OK.
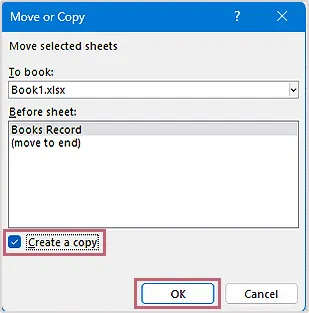
- As a result, you will see a copy of your sheet, by clicking on the tab on the left corner of your sheet.

Therefore, here we have mentioned a few steps to copy your sheet in minutes, hassle-free.
Suggested Read: What are Impressions on LinkedIn? Understand the Metrics and Grow Your Audience
Conclusion
Managing the data in an Excel sheet is crucial these days. To make a clean and credible spreadsheet, you must be sure that the data you have analyzed is duplicate-free.
Therefore, in this article, we have guided you through the various ways to make your spreadsheet effective, consisting of reliable data without any unnecessary entries.
FAQ
Ans:Firstly, select the row you wish to remove the duplicates, and then use the Alt+A+M shortcut key to remove duplicates in Excel.
Ans: The formula to remove duplicates is (=uniqueA1:A30). Remember, the row name will depend on your preference.
Ans:Use simple steps to remove the duplicates:
- Select the data range.
- Data> Remove Duplicates> OK
Sources:
Remove duplicates in Excel: Support Microsoft


