Top FPV Drone Camera
If you’re looking to elevate your FPV flying experience in 2024, choosing the right camera is crucial. The right FPV camera can make all the difference, whether you’re racing, flying at night, or capturing cinematic shots. In this guide, we’ll explore some of the best FPV drone cameras available this year, highlighting key features like latency, resolution, low-light performance, and durability. Whether you’re a beginner or an experienced pilot, we’ve got options for every need and budget. Let’s dive in!
1. Top FPV Drone Cameras for 2024
1.1 DJI O3 Camera & Air Unit Review: FPV’s 4K Game-Changer
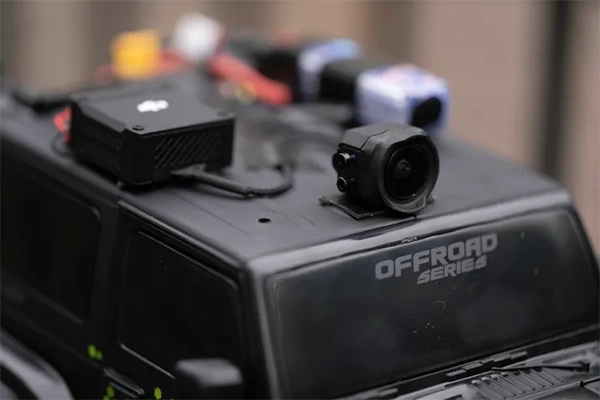
The DJI O3 Air Unit is a top pick for FPV pilots focused on image quality. Though it’s not the lightest or fastest in latency, it offers incredible 4K visuals that rival action cameras, thanks to its 1/1.7-inch sensor and 155° super-wide FOV.
Key Highlights
- 4K/60FPS Footage: Capture ultra-clear, detailed video without needing an external camera. The D-Cinelike color mode and adjustable settings (ISO, shutter speed, etc.) let you tailor shots for stunning cinematic footage.
- Built-in Storage: The 20GB internal storage keeps things simple, letting you record directly without a microSD.
- Stable Transmission: While not the lowest in latency, DJI’s latest transmission tech ensures reliable, high-quality video over distance.
- Customizable View: Adjust exposure, white balance, and even the aspect ratio (4:3 for a taller FOV in goggles) to get the best visuals for any flight.
Verdict: For FPV pilots wanting broadcast-quality footage in one setup, the DJI O3 is a strong recommendation. It’s not the fastest for racing, but the video quality is unmatched.
1.2 Best Analog Camera – RunCam Night Eagle 3
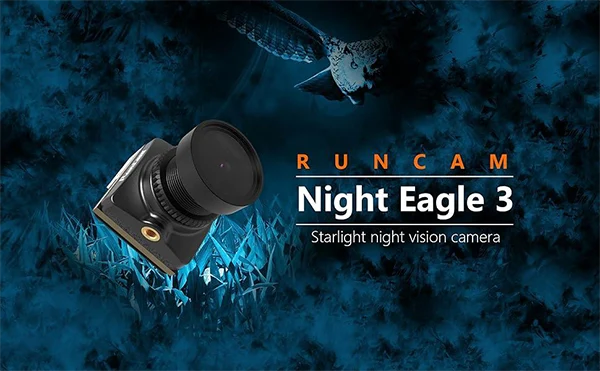
The RunCam Night Eagle 3 is a standout FPV camera for night flying. Its high light sensitivity handles low-light conditions exceptionally well, showing clear black-and-white images even with minimal lighting—just a few streetlights can make a big difference. Unlike most other cameras, it has very low noise in dark settings, giving you a clean, detailed view.
Since it only displays in black and white, it’s not for daytime use. But at night, this feature boosts low-light performance without the distraction of color noise, making it perfect for nighttime exploration.
Verdict: For night flying, the Night Eagle 3 is hard to beat. If you’re serious about low-light FPV, this camera is a top choice.
1.3 Best HDZero – Runcam HDZero Nano90 Camera
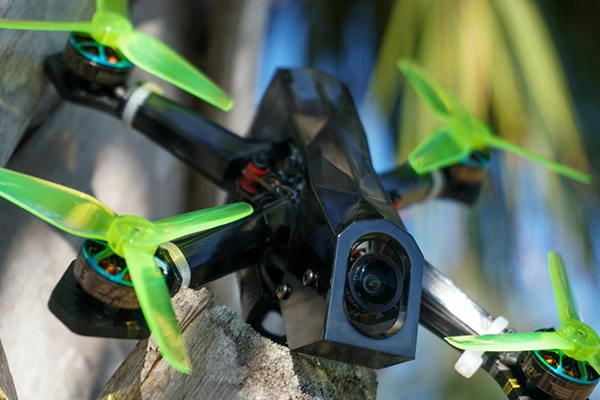
The RunCam HDZero Nano90 is a game-changer for FPV pilots using the HDZero system. It’s the first HDZero camera to offer 90fps at 540p, which means ultra-low latency and a super responsive flying experience—especially valuable for racers and freestyle pilots who need that edge.
Key Highlights
- Unbeatable Latency: In 540p 90fps mode, this camera delivers the lowest latency on the market. You can feel every turn and see each obstacle instantly, giving you precise control during races or freestyle stunts. This mode is only compatible with HDZero Goggles, though; if you’re using the HDZero VRX, you’ll be capped at 720p 60fps.
- Multiple Resolution Modes: The Nano90 also supports 720p at 60fps, which offers a higher resolution option for broader applications. This is a great alternative if you want a sharper image and aren’t relying on 90fps for racing.
- Low-Light Performance: Even in low light, the Nano90 holds up surprisingly well, which is a plus for evening or indoor flying. It maintains clarity in shadows, so you’re not stuck guessing what’s coming up.
With 90fps, you’re getting tighter turns and a crisper response that helps you pull off faster snap rolls and better gate handling. The quick visual feedback really sets this camera apart, making it an essential for racers who need precision.
Verdict: The RunCam HDZero Nano90 is a top-tier camera for pilots who want the best in HDZero. For race or freestyle, the low latency and smooth responsiveness give you a serious advantage. If you’re already in the HDZero ecosystem, this is the camera to get.
1.4 Best Value – Caddx Ratel 2
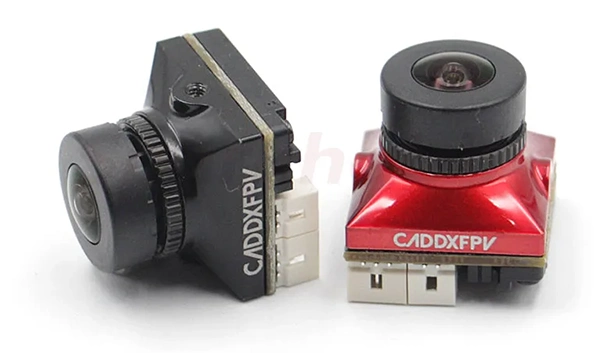
The Caddx Ratel 2 has earned a strong reputation for its reliability and performance, making it a favorite among FPV pilots. It’s a solid choice for those who want a high-quality camera without breaking the bank.
Key Highlights
- Impressive Low-Light Performance: With a 1/1.8″ starlight sensor, the Ratel 2 handles night flying and low-light environments very well, offering clear, sharp images even in near-dark conditions. It’s sensitive up to 0.0001 lux, so you’re not left in the dark when the sun goes down.
- Natural Color and Dynamic Range: Unlike many budget cameras, the Ratel 2 doesn’t sacrifice image quality. Colors are natural and balanced, and it performs well in various lighting conditions thanks to its Super WDR. You get a smooth, contrast-rich view without digital artifacts.
- Customizable Settings: With the OSD menu, you can switch between PAL/NTSC standards and choose between 4:3 and 16:9 aspect ratios, which is handy for different display setups.
With an ultra-low latency of 8ms, the Ratel 2 keeps up during quick turns and fast dives, so you won’t feel any lag in real-time visuals.
Verdict: For the price, the Caddx Ratel 2 is hard to beat. It’s perfect for pilots who need reliable image quality and solid low-light performance without overspending.
2. Comparison Table of Top FPV Cameras
This table summarizes the strengths of each camera, helping FPV pilots find the ideal option based on their flying style, budget, and performance needs. Whether you’re racing, flying at night, or capturing cinematic footage, each camera provides unique advantages.
| Camera Model | Resolution & Frame Rate | Best For | Key Features | Latency | Low-Light Performance | Price Point |
| DJI O3 Air Unit | 4K at 60fps | Cinematic FPV | 1/1.7″ sensor, 155° FOV, D-Cinelike color, 20GB internal storage | Moderate | Moderate | Premium |
| RunCam Night Eagle 3 | Black-and-white, Analog | Night Flying | High light sensitivity, low noise in dark settings | Low | Excellent | Mid-Range |
| RunCam HDZero Nano90 | 540p at 90fps, 720p at 60fps | Racing and Freestyle | Ultra-low latency at 540p 90fps, multiple resolution modes | Ultra-Low | Good | Premium |
| Caddx Ratel 2 | 1200TVL Analog | Budget and Low-Light FPV | Starlight sensor, natural color, Super WDR | Low (8ms) | Very Good | Affordable |
3. Key Features to Look for in an FPV Drone Camera
3.1 Latency
Latency is the delay between the camera capturing an image and displaying it in your goggles. For racers and pilots flying in tight spaces, low latency is crucial. Even a small delay can impact reaction time, making control harder and increasing the risk of crashes.
Low-latency cameras provide real-time feedback, allowing you to react instantly to changes in your environment. Higher latency can make flying feel sluggish, causing obstacles to appear too late to avoid.
For racing, prioritize cameras with the lowest latency. If you’re focused on cinematic flying, a bit of latency might be acceptable for better image quality.
3.2 Image Resolution and Clarity
The resolution of your FPV camera plays a big role in how clear and detailed your video feed will be. Higher resolutions, like 1080p (Full HD), provide sharp, crisp images that make it easier to spot obstacles and navigate tricky terrain, especially at high speeds. The clearer your feed, the safer and more precise your flying experience.
Look for cameras with features like HDR (High Dynamic Range) or WDR (Wide Dynamic Range). These technologies improve image clarity by balancing light and shadow, making it easier to see details in both dark and brightly lit areas. This is especially important when flying in environments with fluctuating light, like near trees, buildings, or during sunset.
Good resolution and clarity mean better control and a more enjoyable flying experience, no matter where or when you’re flying.
3.3 Field of View (FOV)
The Field of View (FOV) of an FPV camera determines how much of your surroundings you can see at once. A wider FOV (120° to 150°) allows you to take in more of the environment, which is great for situational awareness during freestyle flying or exploration. However, too wide a FOV can cause distortion, making objects appear smaller and farther away, which can be tricky when trying to judge distances.
On the other hand, a narrower FOV gives a more focused, zoomed-in view, which can help when you need precise control, especially in racing. This allows you to spot obstacles, like branches, more clearly, but it limits your overall visibility.
FOV is influenced by the lens’s focal length and the sensor size. A larger sensor and shorter focal length will offer a wider FOV. Ultimately, the right FOV depends on your flying style—whether you value precision or a broader perspective.
Here’s a rough estimation of FOV for a camera with a 1/3″ sensor size in 4:3 aspect ratio:
| Lens Focal Length | Approx. FOV |
| 1.8mm | 160° – 170° |
| 2.1mm | 150° – 160° |
| 2.3mm | 140° – 150° |
| 2.5mm | 130° – 140° |
| 2.8mm | 120° – 130° |
| 3.0mm | 110° – 120° |
3.4 Dynamic Range and Low-Light Performance
Wide Dynamic Range (WDR) is key for handling extreme lighting situations, where both bright and dark areas are present in the same frame. A camera with good WDR will help you see details in both shadowed areas and bright skies, preventing overexposure and preserving contrast. This is especially useful for outdoor flying, where you might have sunlight, clouds, and shaded areas all in the same view. A camera with strong WDR will enhance your awareness and help avoid obstacles that might be hidden in shadows or overexposed bright areas.
When flying in low light conditions—like at dusk, dawn, or indoors—you’ll need a camera with excellent low-light performance. Look for a camera with a low LUX rating in the specs, as a lower LUX value means better performance in dim environments. Cameras with larger sensors also perform better in low light, as they can capture more light, resulting in clearer images in darker conditions.
In short, a camera with both good WDR and low-light performance ensures you won’t miss critical details, whether you’re flying in bright daylight or low-light situations like evening or night flying.
3.5 Durability
Crash Resistance is crucial when selecting an FPV camera, as crashes are a common part of drone flying, especially during racing or in challenging environments. A camera built to withstand impacts can save you from frequent repairs or replacements. Look for cameras made with durable materials like aluminum or polycarbonate, which offer solid protection without adding excessive weight.
Protective Housing is another important factor. Some FPV cameras come with added protection like lens hoods or full metal casings, which shield the lens and internal components during hard landings or collisions. This extra protection can significantly extend the life of your camera, especially when flying in environments with obstacles or during high-speed racing.
In short, a durable FPV camera is an investment that helps keep your gear in top shape, even after a rough flight. Prioritizing crash resistance and protective housing will ensure your camera performs well and lasts longer, reducing the need for constant replacements.
4. FPV Camera Setup Tips
Properly setting up your FPV camera can enhance your flying experience. Here are some easy tips to get the best results:
Step 1 – Find the Right Camera Angle:
For racing, set the camera at a higher angle (20-30°) to help with speed and precision. For freestyle, a lower angle (10-20°) gives you better control during flips and rolls.
Step 2 – Adjust the Field of View (FOV):
A narrower FOV (110°-120°) is ideal for racing, while a wider FOV (150°) is better for freestyle or capturing more of your surroundings.
Step 3 – Set Exposure and White Balance:
Adjust exposure to avoid overexposure in bright light, and increase it for low-light conditions. Keep white balance in check to maintain natural colors.
Step 4 – Choose the Right Aspect Ratio:
If you want a taller view for better awareness, use 4:3. For a more cinematic look, 16:9 is better, especially for HD setups.
Step 5 – Protect Your Camera:
Use lens protectors or ND filters to prevent damage during crashes and improve image quality, especially in bright conditions.
Step 6 – Check Settings Before Each Flight:
Do a quick check to make sure your camera settings are correct, including lens condition and camera orientation.
With these simple adjustments, you’ll get better image quality and a more enjoyable FPV experience.

