Why Dryer Vent Cleaning Matters?
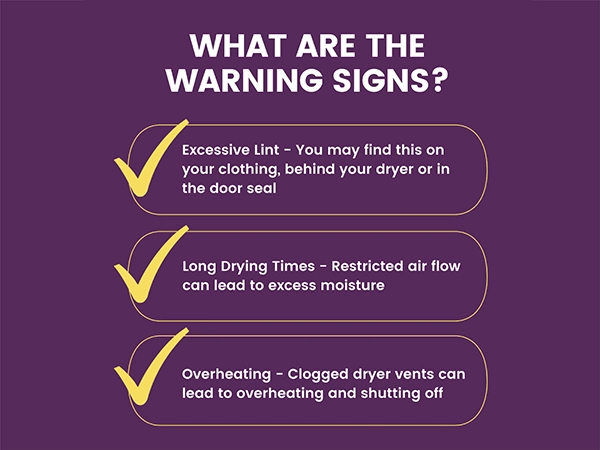
Your dryer requires a clean vent for it to work efficiently and for safety purposes as well. Due to the accumulation of lint and other debris in it, good air circulation is compromised and there is always the danger of fire.
Though not a glamorous job, understanding how to carry out cleaning can be done by the homeowners themselves to avoid possible dangers. However, knowledge about the necessary tools for this project will assist in maintaining the outlet properly.
Welcome to this do-it-yourself tutorial, in which we will explain how to carry out dryer vent cleaning like a pro. Also, learn about Exterior Vs. Interior Dryer Vent Cleaning by reading this article.
Materials And Tools That You Will Require
Before starting the cleaning process, make sure you purchase the following materials and tools for dry vent maintenance. These accessories protect you from any physical harm and do the job without any hassle.
Here are the items you need.
- Screwdriver
- Duct tape
- Safety goggles
- Stiff brush
- Lint brush
- Cordless drill, but it’s optional
- A ladder (in case it is located higher on the roof)
Let’s now understand the dry vent cleaning process in a step-by-step method:
Step 1: Turn Off the Dryer
Regardless of the circumstances, safety comes first. Also, the first step is to unplug the dryer from the outlet or, if it is a gas dryer, turn off the gas connection. Move the dryer from the wall slightly to get space to the outlet during cleaning.
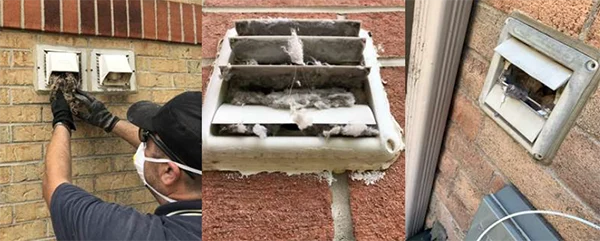
Step 2: Take Off Dryer’s Vent Cover
Search for the position of the duct cover on the outer side of your house. Usually, it is mounted on the roof or wall of the building or structure in question. Loosen the screws that were used to fix the cover in position using your screwdriver. Ensure not to misplace the screws since it can be difficult to pick from the floor in the event you drop them.
THINGS TO CONSIDER
Clean the vent once a season, or at least at the beginning or end of winter, for proper maintenance.
Step 3: Cleaning the Outside Vent
Now that the vent cover is open, you can clean the outside portion with an outlet brush or vacuum. This will help get rid of any lint and debris that could be on the fabric’s surface.
Step 4: Disconnecting the Vent
Take out the dryer’s back venting when you get home. In addition, use duct tape to make sure the vent hose does not come loose while you clean the remaining portion of the outlet.
Step 5: Cleaning the Vent
Now that you have to enter the vent, things are starting to get really interesting. To unscrew any clamps or screws holding the outlet line in place, you might need a cordless drill, depending on how it’s configured.
Make sure to thoroughly clean it with your outlet brush or vacuum attachment after removing the obstruction. As the process progresses, a lot of debris and lint should come out.
USEFUL TIP
You can use a vacuum with a hose attachment to clean the area around the vent.
Step 6: Squeal the Vent Pipe.
Extending your brush or vacuum attachment allows you to attempt to clean the outlet pipe its line is connected to. After the removal process is finished, don’t leave any lint or debris in the pipe.
Step 7: Reconnect and Secure
Replace the vent line to the back of the dryer and tighten the clips or screws accordingly. Ensure it is well fixed.
Step 8: Screwing Back the Cover
Go back outside your house and replace the cover by using the screws that were previously unscrewed. In addition, make sure that it is screwed well.
Step 9: Reconnect the Dryer
Last but not least, reconnect the power cord to the dryer or turn the gas line back on if you had it disconnected. Pull the dryer back towards the wall.
Carrying out outlet maintenance can be a simple DIY project that can help enhance the efficiency, durability, and safety of your dryer. If you follow the guide below about how to clean an outlet, your dryer will work safely and efficiently.
Therefore, get ready, assemble your materials, and start cleaning your dryer vent now! Your house and purse will appreciate it.
For a long-lasting, uninterrupted system, do routine maintenance such as dryer vent cleaning, in Toronto. Moreover, a well-maintained appliance will end up costing less money over time.
How Else Might You Maximize the Use of Your Dryer?
The only thing you need to do to keep clothes dryers operating properly is to keep the vents clear and clean. Investing in a home warranty is one of the best ways to safeguard your capital.
A home warranty protects your pocketbook against unforeseen appliance breakdowns that could otherwise cost hundreds or even thousands of dollars. It covers coverage for major appliances such as washing machines, dryers, and other appliances.
Conclusion
When your dryer isn’t working efficiently, that’s the first sign of its required maintenance. However, instead of waiting for things to get damaged or to avoid hazards, it is advisable to follow the steps mentioned in this article to clean dryer vents.
By taking up this project by yourself, you will not only save money but also keep good ventilation circulation throughout the rooms. If you want to hire cleaning services, it’s a great idea too, as they know the safety measures, have all the necessary tools, and are experienced.
Also, maximize the use of a dryer outlet by investing in a home warranty to safeguard your family from unexpected appliance breakdowns. So, don’t neglect those clogged outlets, and keep your dryer running efficiently for a long time by maintaining a good vent cleaning system.