12 Ways to Effectively Fix the DNS Server Not Responding Error
Are you facing the DNS server not responding error while accessing the internet on your device? Don’t worry, you are not the only one facing this issue, as it is a fairly common error.
It would not be wrong to say that almost everything in this world requires an internet connection to work. Thus, being unable to access the internet is a horrible situation, especially when you are doing an important task.
DNS not responding is annoying, and we are here to help you solve the error. In this article, we will discuss the issue and provide the 12 best practical solutions to troubleshoot your internet connection. So, let’s get into it.
Quick Answer: You can try to restart your router, use a different browser, change the DNS settings, flush your DNS cache, and try many other ways to resolve the DNS not responding error.
What is a DNS Server?
The Domain Name System (DNS) enables us to access information online and browse different websites using URLs and domain names. It eliminates the need to memorize and enter complex numerical IP addresses such as 192.168.1.1 (in IPv4) or 2400:cb00:2048:1::c629:d7a2 (in IPv6).
DNS helps a web browser translate a domain name into an IP address. This system works on four integrated DNS servers, recursive DNS servers, root name servers, top-level DNS, and authoritative name servers.
Understanding the DNS Server Not Responding Error

When you see an error message like “Windows 10 the DNS server is not responding,” it means that the DNS of the domain you are accessing is not available at the moment. It can also sometimes appear on your device when your web browser fails to connect to the internet.
This could be frustrating when you want to access a website urgently, as DNS servers are essential for visiting web pages online. However, this DNS server not responding issue often occurs due to basic faults, and you do not need to reach out to technical support to resolve this.
Resolving the DNS issue can be a straightforward process, but to opt for the correct solution, you should first understand why the DNS server is not responding in Windows 10 or any of your devices.
Also Read: What is 5xx Error: Resolving 5xx Server Error on Instagram!
Most Common Causes of DNS Not Responding
The error message appears when the server fails to match a domain name with an IP address of the website. It could happen due to multiple reasons; here are some of the major causes:
Network Connectivity
You are most probably going to receive a DNS error message when your computer is facing problems connecting to the internet. This problem majorly occurs due to a poor signal, incorrect network settings, or incorrect server settings.
Faulty DNS Records
You are likely to receive an error message if the DNS server address is wrong for a website. If the IP address of the website changes, the accompanying or corresponding DNS server address must change too.
Hardware Problems
The DNS not responding error can also arise from some hardware connected to your device. Of course, the usual ones are modems, network adapters, and routers. You can fix them or replace them to resolve the issue.
Antivirus Software
Even though antivirus, firewall, and VPN software serve to protect your computer, at times they interfere with other operations. They can also interfere with the essential communication between your device and the DNS server.
DNS Server Outage
Sometimes even the DNS servers may go down temporarily, causing DNS server errors on your device. This might happen due to high traffic or any fault with the technology. If the device cannot access a DNS server, there is no way users can access the desired websites.
So, these are the most common reasons behind the messages, like
“DNS not responding” popping up on your screen.
Now that you have a basic idea about DNS servers not responding issue, let’s understand how you can solve the issue of the DNS server not responding in the next section.
How to Fix the DNS Server is Not Responding Error? [12 Ways]
It is quite easy to fix the DNS server-related issue. In this section, we are going to share the possible ways that you can try out if you are getting a “DNS Server Not Responding” error.
Try to Use a Different Browser
One of the simplest ways to get rid of this DNS server not responding problem is to try opening a website on any other browser. Let’s say you are using Microsoft Edge or Firefox when the error occurs. Now you should try to use a different browser, like Google Chrome or a private browser, to visit the same website. For times like this, you need a private browser.
Use a Network Troubleshooter
One of the initial steps to fix the issue is to run network diagnostics. This will help you in diagnosing and troubleshooting all the network errors with ease. We will discuss the steps for running network diagnostics in Windows and Mac.
Here are the steps to diagnose network issues on Windows:
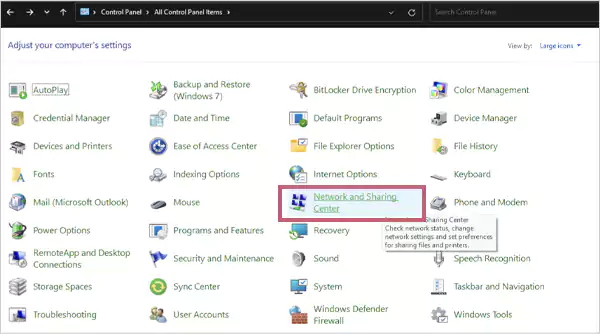
- Step 1: Go to the Control Panel and select the Network and Sharing Center option.
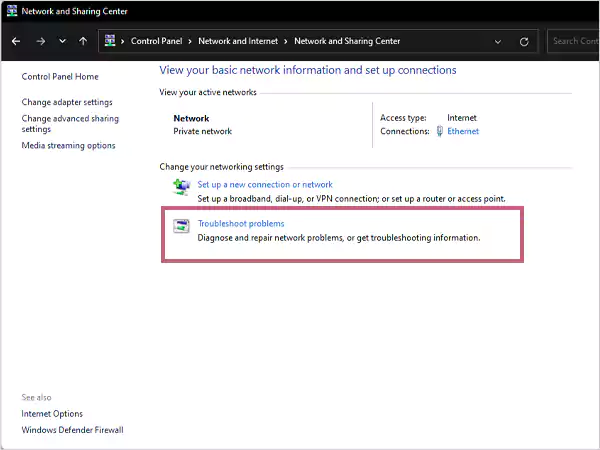
- Step 2: Now, choose the Troubleshoot Problems option under Change your networking settings.
- Step 3: On the next window, scroll done and click on Additional troubleshooters > Internet Connections > Run the Troubleshooter.

Finally, just wait for the troubleshooting process to finish and follow the prompts on the screen to repair the DNS issues if you see an error message after diagnostics.
Now let’s see how to run network diagnostics on a macOS device:
- Step 1: Firstly, close all the open applications and connect with the error-causing network.
- Step 2: Next, hold the Option key, click on the Wi-Fi icon in the menu bar, and select the Open Wireless Diagnostics option.
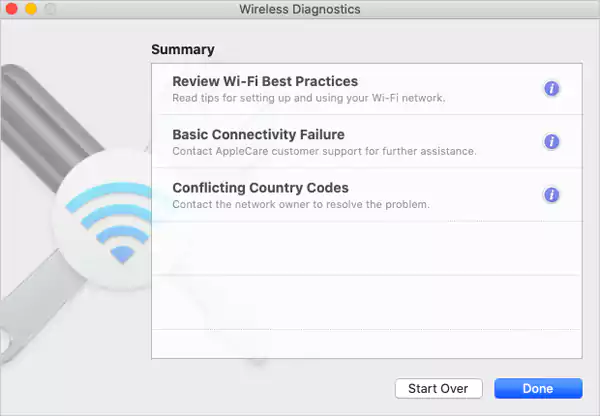
- Step 3: After the scanning process, a summary window will open. Click on the Info icon, learn about each issue in detail, and take the necessary steps to resolve it.
If the issue persists, continue on the quest to find a suitable fix for the DNS server issues.
Restart the Router
The Windows 11DNS Server Not Responding issue may be occurring because of simple data traffic. To resolve this, you can try to simply restart your router.
Just go ahead and turn off your router with the power button. Then, unplug the power cable from your router and wait for around 30 seconds. Finally, put it back to plug in a power outlet and hit the power button once again to start up the router.
Access the Site From a Different Device
Another common method to fix the issue is using a different device that is connected to your network and accessing the same website.
You can use your home Wi-Fi from your smartphone to access that website. If you can access the website using the same network, your device is the culprit for the error. On the contrary, if the issue persists, it is almost certain that the problem is in your network connection.
Additionally, you can also try to use your mobile data to make sure that the issue is not on the website’s end.
Clear Your DNS Cache
Clearing or flushing the DNS cache can also help you resolve the DNS not responding error on your device. The flushing process will remove IP addresses and other DNS data from your web browser’s cache.
Flushing DNS Cache on Windows
One can easily perform this task using the command prompt on Windows.
- Step 1: Press Window + R to open the ‘Run’ window.
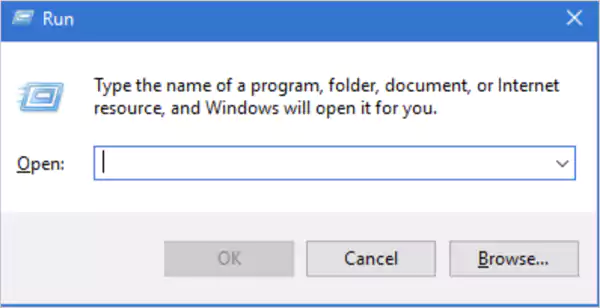
- Step 2: Next, type ‘cmd’ on the ‘Run’ box and press Shift + Ctrl + Enter to run the command prompt.
- Step 3: As an administrator, enter the ‘ipconfig /flushdns’ command on the command prompt and press Enter.
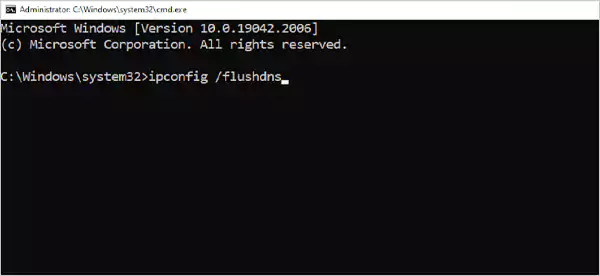
You will see a confirmation message in the command window if the command was successful. Now let’s discuss the same process for Mac.
Flushing DNS Cache on macOS
You can easily flush the DNS cache on the macOS device. Just press F4 to launch the Spotlight search box and type Terminal. Then, on Terminal, you can enter the command to effectively flush the DNS cache.
There are different versions of macOS, which require different commands for this function. The following table will help you find the right command as per your operating system.
| Mac Operating System | Command |
| Catalina, High Sierra, Mojave, Sierra, X El Capitan, X Lion, X Mavericks, X Mountain Lion | sudo killall -HUP mDNSResponder |
| Big Sur | sudo dscacheutil -flushcache; sudo killall -HUP mDNSResponde |
| X Yosemite | sudo discoveryutil udnsflushcaches |
| X Snow Leopard | sudo dscacheutil -flushcache |
| X Leopard and below | sudo lookupd -flushcache |
Change the DNS Server Address
DNS issues can also be the result of a misbehaving DNS server provided by your Internet Service Provider (ISP). You can fix this by changing the server; try using a public DNS server from organizations like Google and Cloudflare.
Switching to a different server can also speed up page loading and improve privacy. Here are the most popular alternate DNS providers:
- Google: 8.8.8.8 and 8.8.4.4
- Cloudflare: 1.1.1.1 and 1.0.0.1
- OpenDNS: 208.67.222.222 and 208.67.220.220
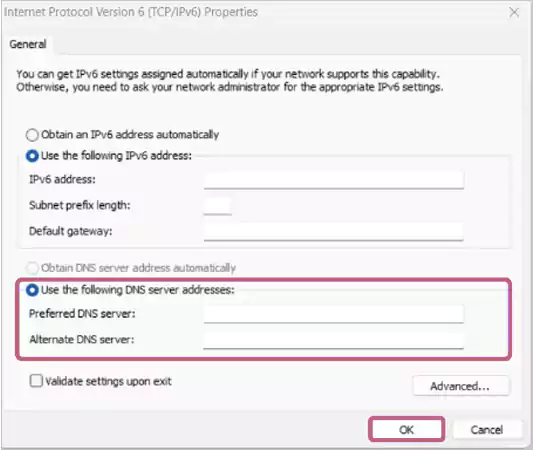
Switching DNS Server Address on Windows:
- Step 1: Go to Control Panel > Network Connections > Properties.
- Step 2: Now, enter the IP address under the Preferred DNS server and Alternate DNS server.
- Step 3: At last, click on OK to save your changes.
Switching DNS Server Address on Mac:
- Step 1: On your Mac, go to System Preferences > Network.
- Step 2: Select your primary network connection and go to Details > DNS.
- Step 3: Click on the + button at the bottom of the DNS server list and enter your preferred DNS address.
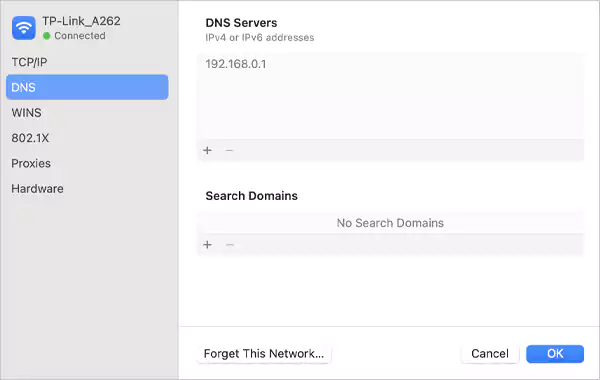
- Step 4: Finally, click OK to apply changes on your device.
If you don’t find this method to resolve your issue, please continue to read and find other possible fixes.
Turn Off IPv6 on Your computer
Internet Protocol Version 6 (IPv6) is the latest version of the protocol. However, some people have found disabling IPv6 on your device helpful in fixing the DNS server not responding issue.
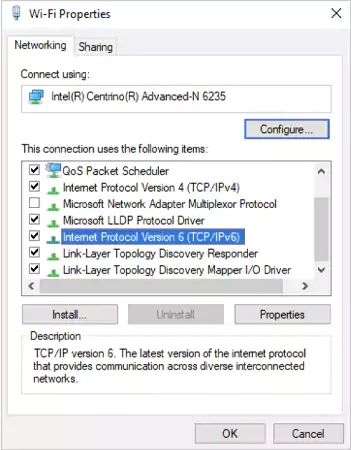
For Windows:
- Step 1: Navigate to Control Panel > Network and Internet > Network and Sharing Center.
- Step 2: Click on your active internet connections and then select the Properties button on the dialogue box.
- Step 3: Now, under the list of ‘This connection uses the following items’, uncheck the ‘Internet Protocol Version 6 (TCP/IPv6)’ option. Finally, click on OK to save changes.
For macOS:
- Step 1: Go to System Settings > Network.
- Step 2: Select your active internet connection and then click on Details.
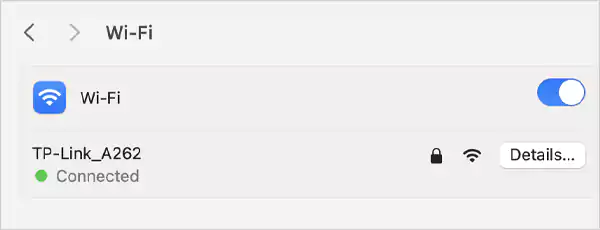
- Step 3: Now, click on the TCP/IP section.
- Step 4: Next, click on Configure IPv6 and select the ‘Link-local Only’ option.
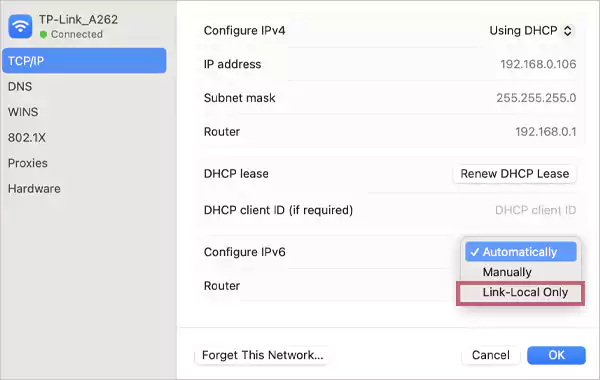
- Step 5: Finally, click on OK and restart your device.
After switching to IPv4, your issue should be resolved. However, if the issue still persists, you can still try a few more ways.
Restart Your PC in Safe Mode
It might be possible that an operating system that is not functioning properly can be the reason for your “DNS is not responding” errors.
Thus, to be sure about the cause, just restart your device in safe mode. Safe mode on a computer is a stripped-down version of your OS, which can restrict the resources used for operating a device.
Now, if your issue is resolved in safe mode, then it is third-party software that is causing the DNS not responding errors. A quick fix to resolve this is to find out the faulty application and delete it from your device.
Disable Antivirus and Firewall
Although applications like antivirus and firewalls work to protect your device, there are times when these tools interfere too much with the internet connection. This interference sometimes leads to errors like the DNS server not responding.
As a result, you should try to temporarily disable your antivirus or firewall protection. This will help you detect the probable cause of the DNS problems and work accordingly.
Update the Network Adapter Driver on Your PC
A network adapter driver allows the operating system to establish communication with the network adapters. You should regularly update your network driver software; otherwise, it will start creating multiple problems.
Many devices can automatically handle the task of updating network drivers. However, you can also take control of the settings manually on some devices. After updating the driver, try to restart your PC and see if the issue is resolved.
Turn off the VPN
A strong and reliable Virtual Private Network (VPN), offers an additional layer of security and privacy by routing data through a different server. However, the issue is that it can also bypass your default DNS server, causing DNS not responding errors on your device.
You can check for this possibility by disabling your VPN and accessing the same website. If the issue is resolved, then you should try to change the DNS filtering settings of your VPN. If you can’t find a way, please try to contact your VPN provider’s customer support for assistance.
Disable Peer-To-Peer Feature (Windows)
The peer-to-peer feature on Windows can help you reduce the amount of bandwidth required for downloading updates. We will not go into details about how this feature works, but what is important to understand is that despite being a useful feature, P2P can cause trouble in the DNS lookup process. Disabling the feature can help you resolve the issue.
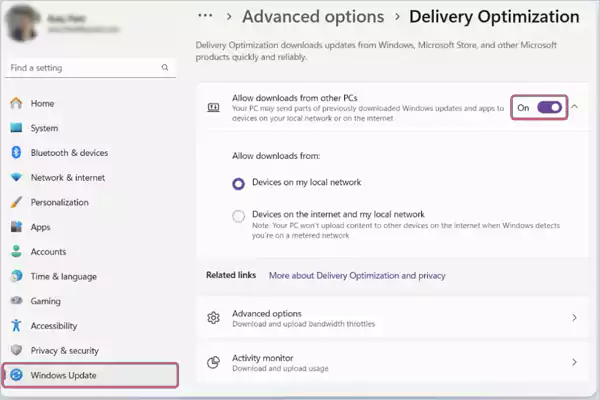
Here is how to turn off the Windows P2P feature:
- Step 1: Go to Settings > Windows Update.
- Step 2: Click on Advanced Options and then select the Delivery Optimization option.
- Step 3: Now, just turn off the ‘Allow downloads from other PCs’ option.
Finally, just try to restart the computer to see if the issue is fixed.
If none of the earlier methods worked in your favor, this was your last major option to troubleshoot from your end.
9 out of 10 times, one of the 12 methods should help you easily resolve the issue of the DNS server not responding. However, don’t shy away from asking for technical support if none of the above methods work for you.
Also Read: 6 Best Methods to Troubleshoot Windows Format Error: Everything You Need to Know
Final Words
We understand that errors like “DNS server is not responding” can be a bit annoying and frustrating, but finding the right cause and taking the right steps can help you resolve the problem without breaking a sweat.
The detailed steps provided in this article will guide you to easily fix these DNS server errors. You should also take preventive measures to avoid any such future errors and ensure a smooth online experience. You can try to regularly update your drivers and configure reliable servers.
We hope that this article was useful for you and that it helps you stay connected to the internet without any hassle.
Frequently Asked Questions (FAQs)
Ans: This is an error message, which appears on your device when the DNS of a particular domain fails to connect with your network or is not available at the moment.
Ans: Incorrect DNS settings and router settings, corrupted files, hardware problems, third-party interference, and faulty DNS servers are some of the major causes of a DNS error.
Ans: You can find your DNS server on the command-line app of your device. Just type ipconfig/all and press Enter. The first address listed under the DNS servers is your primary server.
Ans: Go to Settings > Network & Internet > Change Adapter Settings. Next, right-click on the active connection and select properties. Finally, enter the preferred server address and save your changes.
Ans: If the DNS server is not responding in Windows 10 or 11, you can try to regularly update network drivers, ensure firewall and antivirus compatibility with your device, and use reliable DNS servers.
Sources: