Boost Visuals with AI Upscaling and Talking Photos
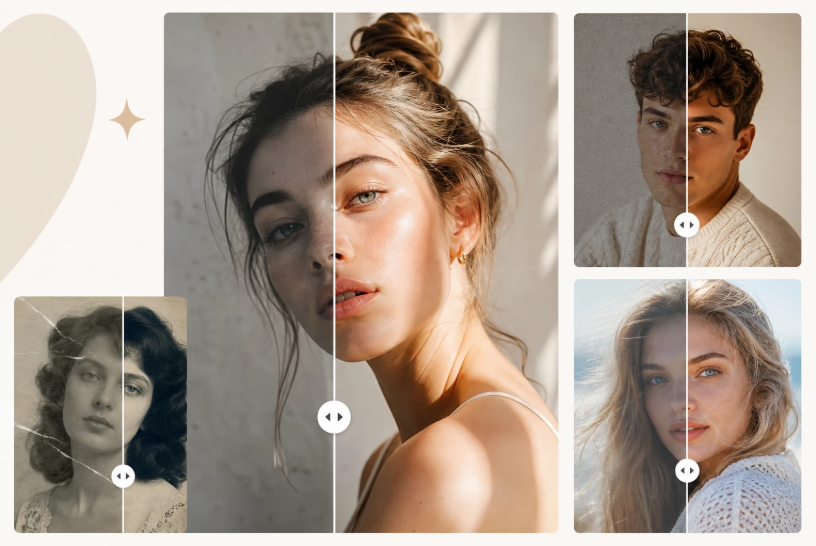
A picture can grab someone’s attention, but a blurred picture or a dull portrait can easily lose that attention. The good news is that there is no need to spend a lot of money on expensive cameras and sophisticated editing software in order to enhance normal pictures.
With an image upscaler 16k, you can upscale and sharpen your pictures to create visually appealing graphics and use them in different projects. However, it is only half the way.
With a Talking Photo tool, you can add movement and speech to a static portrait, turning a simple image into engaging video content. Together, these AI tools make visual creation faster, easier, and more creative.
| Table of Contents Step 1: Prepare Your Source ImageStep 2: Increase Resolution with AIStep 3: Refine the DetailsStep 4: Animate the FaceStep 5: Add Audio and ScriptStep 6: Preview and ExportTips and Best PracticesCommon Mistakes to AvoidConclusionFAQs |
Step 1: Prepare Your Source Image
Begin by choosing the right photo for your project. The better the original file, the better the final result will be. Look for images with good lighting and clear elements. If you are working with an old or small photo, make sure it is not too distorted. You should clean up any noticeable dust or scratches using a basic editor before you start the AI process.
Step 2: Increase Resolution with AI
Once you have your photo, you need to make it bigger. Traditional resizing usually makes images look pixelated or soft. AI upscaling works differently because it predicts where pixels should go. Upload your file to the upscaler and choose the 16k option. The system will analyze the textures and edges to create a sharp, massive version of your original image.
Step 3: Refine the Details
After the upscaling process finishes, inspect the results. Look at the eyes, hair, and skin textures. The AI should have added detail that wasn’t visible before. If the image looks too sharp, you can modify the settings to make it look more natural. Save this high-resolution file as your new master copy. You will use this version for all your future edits.
Step 4: Animate the Face
Now that you have a clear image, it is time to add movement. Upload your high-resolution portrait to the animation tool. You will be required to select the areas of the face that should move, such as the mouth and eyes. Most tools do this automatically by scanning for facial landmarks. This guarantees the movement looks realistic and stays synced with the head position.
Step 5: Add Audio and Script
A talking image requires a voice. You can upload a recording of your own voice or use a text-to-speech generator. If you use a generator, select a voice that matches the person in the photo. Make sure the script is straightforward and concise. The AI will then match the mouth movements to the sounds in the audio file. This creates the illusion that the person in the photo is actually speaking.
Step 6: Preview and Export
Always watch the preview before you download the final video. Inspect to see if the lip movements match the words correctly. Look for any strange warping around the jaw or neck. If everything looks fine, export the file in a high-quality format like MP4. You now have a high-definition video produced from a single static photo.
Tips and Best Practices
To get the best results, always use photos where the subject is facing the camera directly. Side profiles are much more difficult for the AI to animate correctly. Good lighting is also important. If half of the face is in deep shadow, the upscaler might create strange patterns in the dark areas. Try to utilize images with even lighting across the face.
Keep your audio clips short. Long videos can sometimes lose synchronization between the voice and the mouth. A clip between fifteen and thirty seconds is generally perfect for social media. If you require a longer message, consider breaking it into smaller segments. This keeps the viewer engaged and ensures the technical quality remains high throughout the video.
When you upscale to 16 K, remember that the file size will be very large. These files are great for professional printing or large digital billboards. However, for standard website use, you might want to compress the file slightly after upscaling. This offers you the advantage of the added detail without slowing down your website loading times.
Common Mistakes to Avoid
One big mistake is using a photo that is too blurry to begin with. While AI is powerful, it cannot invent details that are completely missing. If the eyes are just two dark smudges, the upscaler will struggle to make them look real. Always start with the clearest version of the photo you can find.
Another mistake is ignoring the background. When you animate a photo, the background stays still while the face moves. If the background is very busy or has people moving in it, the effect can look fake. Use a simple or blurred background to keep the focus on the talking subject. This makes the animation feel more natural and professional.
Do not overdo the settings on the upscaler. It is tempting to push every slider to the maximum, but this can lead to a plastic look. Skin should still have pores and tiny imperfections. If you remove all the natural texture, the person will look like a doll. Aim for a balance between clarity and realism to keep your audience interested.
Avoid using low-quality audio recordings. If there is background noise or static in your voiceover, it will distract from the visual quality. Use a decent microphone or a high-quality AI voice generator. Clear sound makes the talking animation much more believable. People will forgive a small visual glitch, but they will turn off a video with bad audio.
Conclusion
Enhancing your visual content does not have to be a difficult chore. By using tools like AI upscaling and talking animations, you can create professional assets from simple photos. These techniques help you reach a wider audience by providing clear, engaging, and unique content. Begin with a good photo, boost the resolution, and add a voice to see how much your engagement grows. You’ll find that these small steps lead to much better results for your brand or personal projects. High-quality visuals are now within reach for everyone.
FAQs
What is AI upscaling?
AI upscaling involves the use of artificial intelligence technology to upscale an image by increasing its resolution, along with the enhancement of edges and sharpening of details. It helps in making low-quality images more suitable for larger screens.
What is a talking photo?
A talking photo refers to a static picture that is given facial movements to make the subject appear as though they are talking.
Which photo is suitable for AI talking photo websites?
Photos that are well-lit and where the subject looks at the camera are usually the best. Photos with the person looking directly at the camera work better for AI software.
What mistakes shouldn’t I commit using AI upscaling and talking photo websites?
Don’t start with photos that are very blurry, don’t over-sharpen images, don’t use bad-quality audio, and don’t use heavily shadowed portraits.